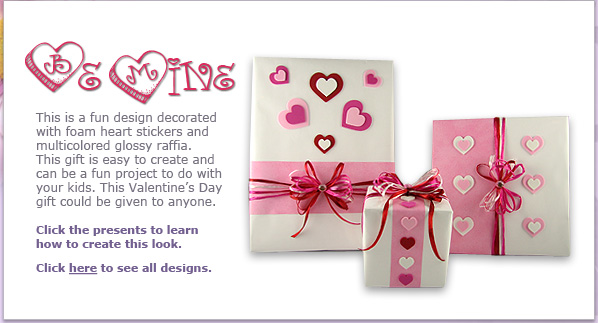
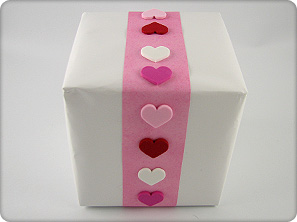
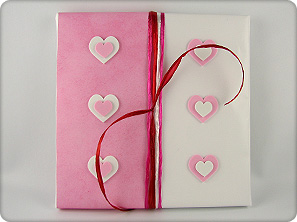
Small Box
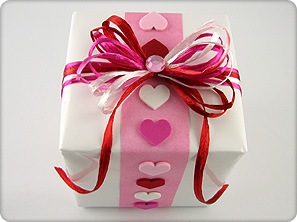
Difficulty - Easy
This design is best suited for a tall box
Materials
- White wrapping paper
- Pink sponged craft or scrapbooking paper
- Multi-colored glossy raffia (white, pink and red)
- 12 small foam heart stickers in multiple colors
- 1 medium sized pink rhinestone
Instructions
- Wrap a box in white wrapping paper.
- Cut a 1-1/2 inch wide piece of the pink craft paper the length to
wrap around the entire box plus 1 inch.
- If the craft paper is not long enough to wrap around the entire
box, tape two pieces together on the wrong side of the paper to achieve
the desired length.
- Using double-sided tape, tape the inside of the craft paper in even
intervals at the edges. Apply to the box, centering the paper evenly
on the top of the box and overlapping the ends on the bottom of the
box.
- Peel the backing off the foam heart stickers and attach 4 hearts
in alternating colors on each side of the box. Change the direction
of the hearts on the 3rd heart on the top of the box (as shown below)
so the hearts will be facing the correct direction going down the
other side of the box.
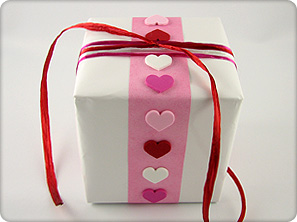
- Wrap the raffia 4 times continuously around the box and tie on one
the middle strings, leaving a few inches for tails. Don't worry if
ribbon crosses on the bottom of the box.
- Feed each tail under the ribbons and tie a knot to cinch the ribbons
together.
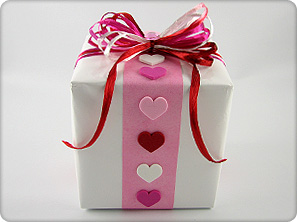
- To make the bow, hold the ribbon about 6 inches from the end with
your thumb and form a loop. Securing the loop with your thumb, form
another loop on the opposite side of the first loop. Continue this
motion, holding each new loop with your thumb, until you have 8 loops
on each side.
- Tie the bow to the package using the ribbon tails.
- Separate the loops from each other and fluff the bow. Closely trim
the ends of the knot and then trim the ribbon tails to the desired
length.
- Glue the pink rhinestone onto the middle of the bow.
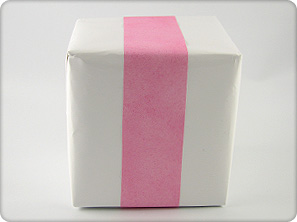
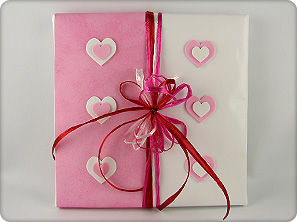
Medium Square Box
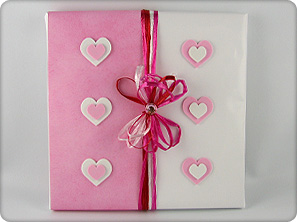
Difficulty - Easy
This design is best suited for a square box
Materials
- White wrapping paper
- Pink sponged craft or scrapbooking paper
- Multi-colored glossy raffia (white, pink and red)
- 12 foam heart stickers (3 medium white, 3 small white, 3 medium
pink and 3 small pink)
- 1 medium sized pink rhinestone
Instructions
- Wrap a box in white wrapping paper.
- Cut a piece of the pink craft paper half of the width of the box
and long enough to wrap around the entire box plus 1 inch. If the
craft paper is not long enough to wrap around the entire box, tape
two pieces together on the wrong side of the paper to achieve the
desired length.
- Using double-sided tape, tape the inside of the craft paper in even
intervals at the edges. Apply to the top of the box, lining up the
edges of the craft paper with the left edge of the box and overlapping
the edges on the paper bottom of the box.
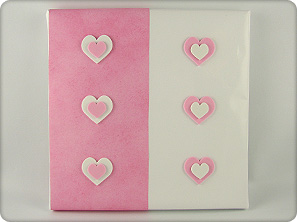
- Peel the backing off the foam heart stickers and attach 3 medium
white hearts centered on the pink side of the box and 3 medium pink
hearts centered on the white side of the box.
- Peel the backing off the small foam hearts stickers and place 3
small white hearts centered on top of the pink hearts and 3 pink hearts
centered on top of the white hearts.
- Wrap the raffia 4 times continuously around the box and tie on one
the middle strings, leaving a few inches for tails. Don't worry if
ribbon crosses on the bottom of the box.
- Feed each tail under the ribbons and tie a knot to cinch the ribbons
together.
- To make the bow, hold the ribbon about 3 inches from the end with
your thumb and form a loop. Securing the loop with your thumb, form
another loop on the opposite side of the first loop. Continue this
motion, holding each new loop with your thumb, until you have 8 loops
on each side.
- Tie the bow to the package using the ribbon tails making sure that
the loops are vertical so they do not cover the foam hearts.
- Separate the loops from each other and fluff the bow. Closely trim
the ends of the knot and the ribbon tails from the bow.
- Glue the pink rhinestone onto the middle of the bow.
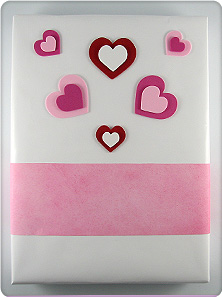
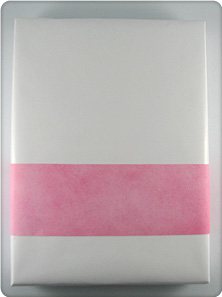
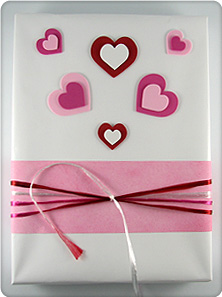
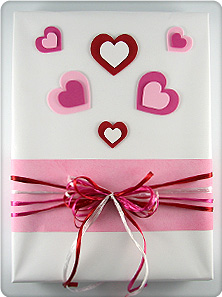
Large Rectangular Box
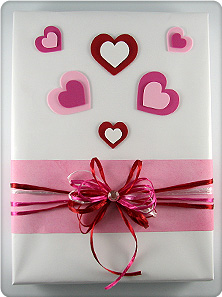
Difficulty - Easy
This design is best suited for a rectangular box
Materials
- White wrapping paper
- Pink sponged craft or scrapbooking paper
- Multi-colored glossy raffia (white, pink and red)
- Foam heart stickers in multiple colors (3 large, 6 medium and 3
small)
- 1 medium sized pink rhinestone
Instructions
- Wrap a box in white wrapping paper.
- Cut a piece of the pink craft paper 1/4 the size of the length of
the box and long enough to wrap around the entire box plus 1 inch.
- If the craft paper is not long enough to wrap around the entire
box, tape two pieces together on the wrong side of the paper to achieve
the desired length.
- Using double-sided tape, tape the inside of the craft paper in even
intervals at the edges. Apply to the box about 2 inches from the bottom
edge of the box and overlapping the ends on the bottom of the box.
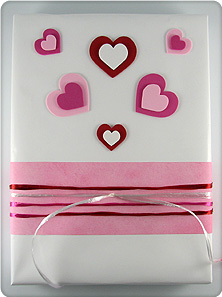
- Peel the backing off the 3 large foam heart stickers and attach
in the configuration shown below. Attach 3 medium hearts of alternating
colors center on top of the large hearts.
- Arrange the medium and small foam hearts stickers as show in the
picture below and attach small hearts of alternating colors center
on top of the medium hearts.
- Wrap the raffia 4 times continuously around the box and tie on one
the middle strings, leaving a few inches for tails. Don't worry if
ribbon crosses on the bottom of the box.
- Feed the each tail under the ribbons and tie a knot to cinch the
ribbons together.
- To make the bow, hold the ribbon about 3 inches from the end with
your thumb and form a loop. Securing the loop with your thumb, form
another loop on the opposite side of the first loop. Continue this
motion, holding each new loop with your thumb, until you have 10 loops
on each side.
- Tie the bow to the package using the ribbon tails.
- Separate the loops from each other and fluff the bow. Closely trim
the ends of the knot and the trim the ribbon tails to the desired
length.
- Glue the pink rhinestone onto the middle of the bow.
|