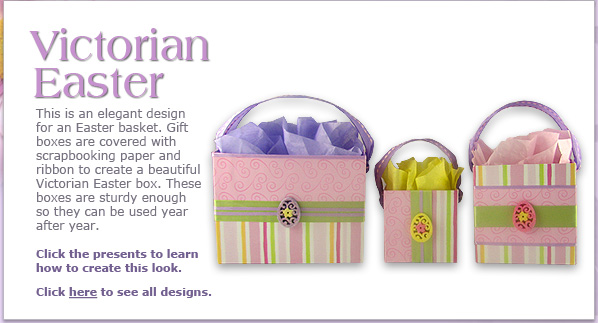
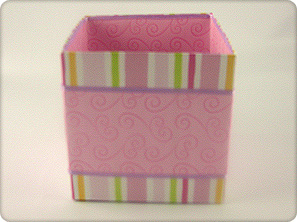
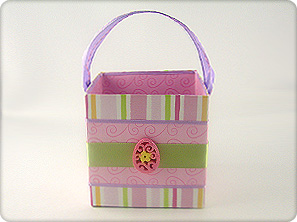
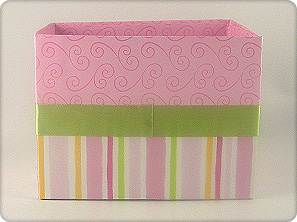
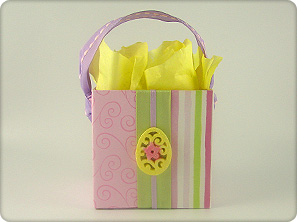
Small Square Box
Difficulty - Hard
Materials
- Small square gift box
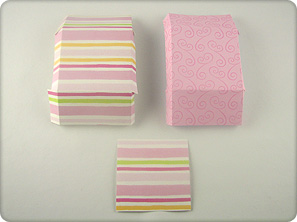
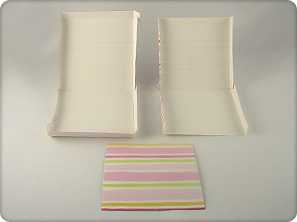
- Pastel striped scrapbooking or craft paper
- Pink scroll designed scrapbooking or craft paper
- 1 fancy yellow Easter egg ornament (string removed)
- 1 inch wide green satin ribbon
- 1/8 inch wide lavender ribbon
- 1-1/2 inch wide wired lavender decorative ribbon
- ¼ inch hole puncher
- Decorative yellow tissue paper
Instructions
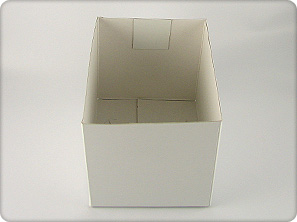
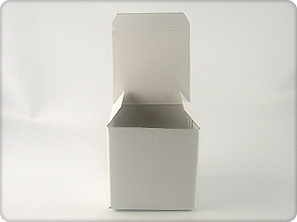
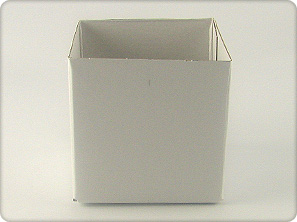
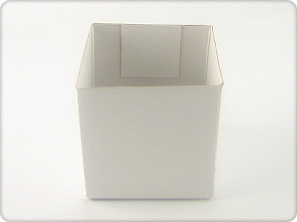
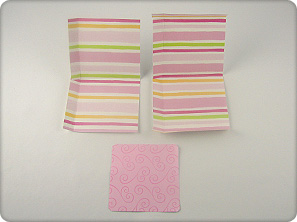
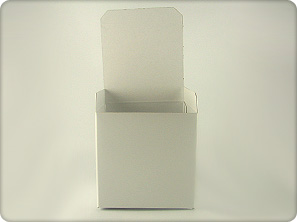
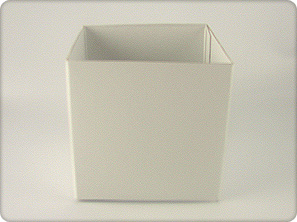
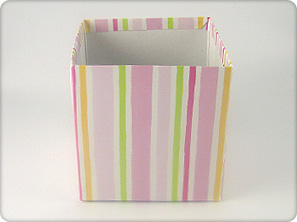
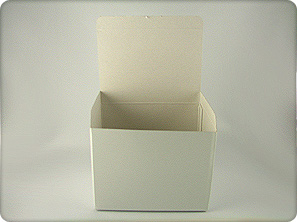
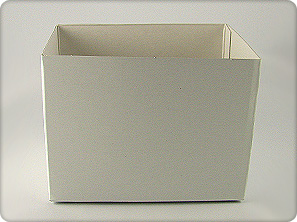
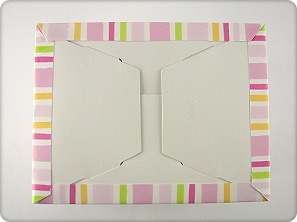
- Cut the top and side flaps off of the gift box to make an open top box.
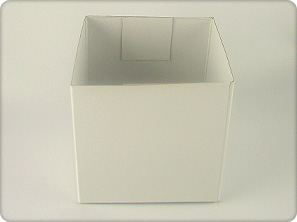
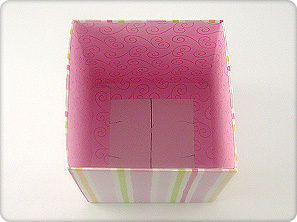
- Cut two 1-1/2 inch squares from the removed box top.
- Glue each square on the inside center top of the box, on opposite sides. This will help reinforce the handle. These will become the sides of the box.
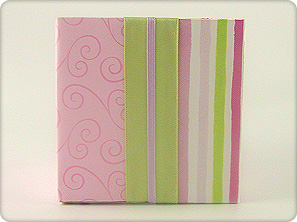
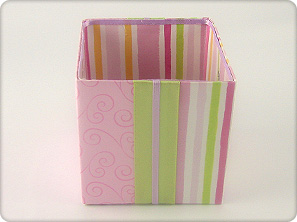
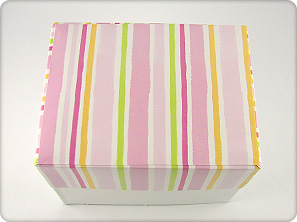
To cover the outside of the box:
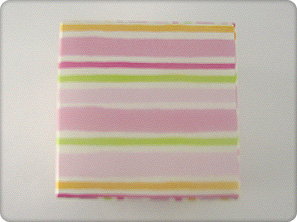
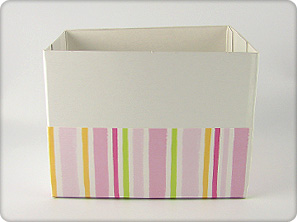
- Cut a piece of the striped craft paper wide enough to wrap half way around the entire box (2 complete sides of the box) and the entire length plus 1 inch.
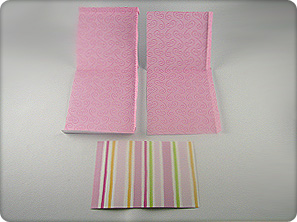
- Cut a piece of the pink scroll craft paper long enough to wrap half way around the entire box (2 complete sides of the box) and the entire length plus 1 inch.
- Cut a piece of the striped craft paper the entire size of the bottom of the box.
- Measure a half of inch on both the top and bottom edge of each pattern of craft paper and fold to create a box edge.
- Wrap the paper around the box to make sure the folded edges fit nicely to the shape of the box. Adjust the folds if necessary.
- Make ½ inch cuts on each corner of the ½ inch fold so the edges will form a box shape.
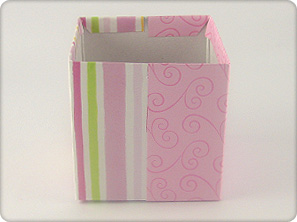
- Apply craft glue to the inside of the striped craft paper and attach it to the front of the box, lining up the edge of the paper with the center front of the box. Fit the folded edge to the bottom of your box and glue the ½ inch flap to the underside of the box.
- Fold the paper down over the open top of the box and glue.
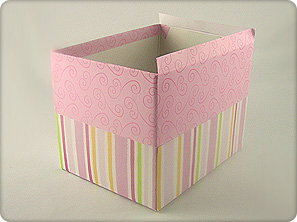
- Repeat the previous steps with the pink scroll paper.
- Cut a 2 pieces of both the green and lavender ribbon the length of the front of the box plus 1 inch.
- Glue the green ribbon to the front of the box so it is centered over the edges where the two craft papers meet, folding ½ inch of the ribbon under the bottom and over top of the box.
- Apply glue to the violet ribbon and attach the ribbon to the center of the green ribbon, folding ½ inch of the ribbon under the bottom and over top of the box.
- Repeat with these steps on the back of the box.
- Apply glue to the striped craft paper that was cut to size the bottom of the box and attach.
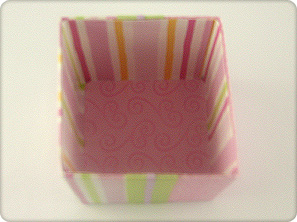
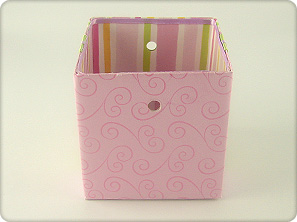
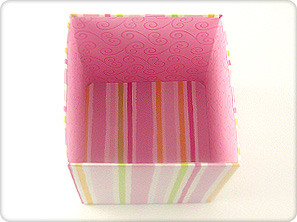
To line the inside of the box:
- Cut a piece of the striped craft paper wide enough to wrap half way around the entire box (2 complete sides of the box) and the entire length plus ½ inch.
- Cut a second piece of the striped craft paper wide enough to wrap half way around the entire box (2 complete sides of the box) and the entire length.
- Cut a piece of the pink scroll craft paper the entire size of the bottom of the box. Cut the tips off the corners of the square. (Try fitting it inside the box before gluing to make sure it is not too tight. The square may have to be trimmed a little to make sure it fits nicely.)
- Measure a 1/2 inch on the bottom edge of each piece of the striped craft paper and fold to create a box edge.
- On the piece that is an extra 1 inch wider, measure ½ inch on each side of the paper and fold to create a box edge.
- Make ½ inch cuts on each corner of the bottom ½ inch fold so the edges will form a box shape.
- Apply craft glue to the inside of the longer striped craft paper and attach it to two sides of the inside of the box, lining up the edge of the paper with top edge the box. Fit the bottom folded edge to inside bottom of the box and the folded sides should overlap the inside corners of the box.
- Repeat the previous steps with the smaller piece of striped paper, meeting the side edges of the paper with the corners of the box. This paper should overlap the other piece.
- Apply glue to the pink scrolled craft paper that was cut to size the inside bottom of the box and attach.
- Cut a piece of the thin lavender ribbon long enough to wrap around the entire inside of the box plus 1/4 inch for overlap.
- Apply glue to the inside edge of the box and attach the ribbon, starting at a corner, overlapping the ribbon at the end. This ribbon should cover the craft paper edge.
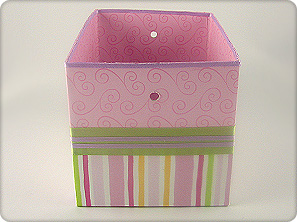
- Using a ¼ inch round hole punch, punch a hole ¾ inch from the top of the box on the center of each side where the reinforcement was glued.
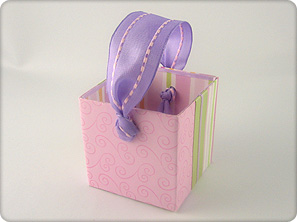
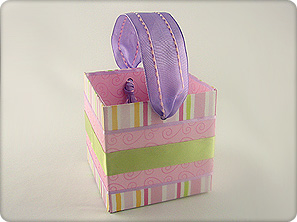
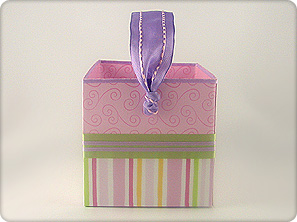
- Cut a piece of the lavender decorative ribbon the desired length of the handle plus 16 inches.
- Tie a knot on one end of the ribbon and feed the ribbon through one side of the box keeping the knot on the inside of the box.
- Tie a knot on the outside of the box on the other side of the hole. Try to make sure there is not much slack between the inside and outside knot.
- Allow the amount of ribbon desired for the length of the handle and tie a knot at the end.
- Feed the remaining length of the ribbon through the other hole and tie a knot on the inside of the box. Try to make sure there is not much slack between the inside and outside knot.
- Trim the ends of each knot on the inside of the box.
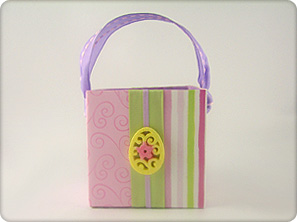
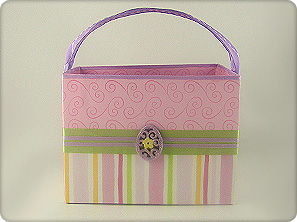
- Glue the Easter egg ornament onto the center front of the box over the ribbon.
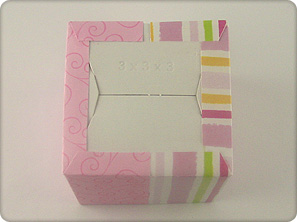
- Fill the bag with layered yellow tissue paper to finish your Easter bag.
Note: After layering the tissue, cut the top angles of the tissue off with scissors to achieve the look in this picture.
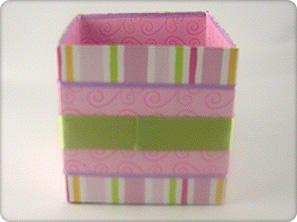
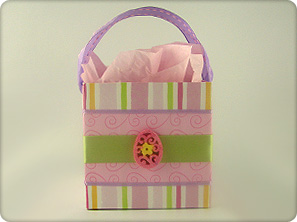
Medium Square Box
Difficulty - Hard
Materials
- Medium square gift box
- Pastel striped scrapbooking or craft paper
- Pink scroll designed scrapbooking or craft paper
- 1 fancy pink Easter egg ornament (string removed)
- 1 inch wide green satin ribbon
- 1/8 inch wide lavender ribbon
- 1-1/2 inch wide wired lavender decorative ribbon
- ¼ inch hole puncher
- Decorative pink tissue paper
Instructions
- Cut the top and side flaps off of the gift box to make an open top box.
- Cut two 1-1/2 inch squares from the removed box top.
- Glue each square on the inside center top of the box, on opposite sides. This will help reinforce the handle. These will become the sides of the box.
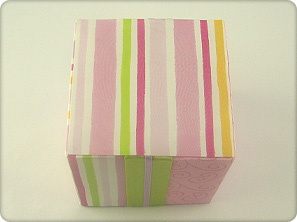
To cover the outside of the box:
- Cut a piece of the striped craft paper wide enough to wrap half way around the entire box (2 complete sides of the box) plus 1 inch and the entire length plus 1 inch.
- Cut another piece of the striped craft paper wide enough to wrap half way around the entire box (2 complete sides of the box) and the entire length plus 1 inch.
- Cut a piece of the striped craft paper the entire size of the bottom of the box.
- Measure a half of inch on both the top and bottom edge of each pattern of craft paper and fold to create a box edge.
- On the piece that is an extra 1 inch wider, measure ½ inch on each side of the paper and fold to create a box edge.
- Wrap the paper around the box to make sure the folded edges fit nicely to the shape of the box. Adjust the folds if necessary.
- Make ½ inch cuts on each corner of the ½ inch fold so the edges will form a box shape.
- Apply craft glue to the inside of the striped craft paper with the folded edges and attach it to the two full sides of the box, lining up the folded sides of the paper with the corners of the box. Fit the bottom folded edge to bottom of the box and the folded sides should overlap the outside corners of the box.
- Fold the paper down over the open top of the box and glue.
- Repeat the previous steps with the smaller piece of striped paper, meeting the side edges of the paper with the corners of the box. This paper should overlap the other piece.
- Apply glue to the striped craft paper that was cut to size the bottom of the box and attach.
To line the inside of the box:
- Cut a piece of the pink scroll craft paper wide enough to wrap half way around the entire box (2 complete sides of the box) and the entire length plus ½ inch.
- Cut a second piece of the striped craft paper wide enough to wrap half way around the entire box (2 complete sides of the box) and the entire length.
- Cut a piece of the striped craft paper the entire size of the bottom of the box. Cut the tips off the corners of the square. (Try fitting it inside the box before gluing to make sure it is not too tight. The square may have to be trimmed a little to make sure it fits nicely.)
- Measure a 1/2 inch on the bottom edge of each piece of the striped craft paper and fold to create a box edge.
- Apply craft glue to the inside of the longer pink scroll craft paper and attach it to two sides of the inside of the box, lining up the edge of the paper with top edge the box. Fit the bottom folded edge to inside bottom of the box and the folded sides should overlap the inside corners of the box.
- Repeat the previous steps with the smaller piece of pink paper, meeting the side edges of the paper with the corners of the box. This paper should overlap the other piece.
- Apply glue to the striped craft paper that was cut to size the inside bottom of the box and attach.
- Cut a piece of the pink scrolled craft paper 2/4 the length and wide enough to wrap half way around the entire box (2 complete sides of the box) plus 1 inch.
- Cut another piece of the pink scrolled craft paper 2/4 the length and wide enough to wrap half way around the entire box (2 complete sides of the box).
- On the piece that is an extra 1 inch wider, measure ½ inch on each side of the paper and fold to create a box edge.
- Wrap the paper around the box to make sure the folded edges fit nicely to the shape of the box, adjusting the folds if necessary.
- Apply craft glue to the inside of the longer pink scroll craft paper and attach it to two sides on the outside of the box, centering the paper evenly on the box. Fit the side folded edges should overlap the outside corners of the box.
- Repeat the previous steps with the smaller piece of pink paper, meeting the side edges of the paper with the corners of the box. This paper should overlap the other piece.
- Cut 3 pieces of the thin lavender ribbon long enough to wrap around the entire width of the box plus 1/4 inch for overlap.
- Apply glue to the inside edge of the box and attach the 1 piece of ribbon, starting at a corner, overlapping the ribbon at the end. This ribbon should cover the craft paper edge.
- Glue the other 2 pieces of lavender ribbon to the outside of the box so one piece is centered over the top edge of the craft paper and the other is centered over the bottom edge of the craft paper.
- Cut a piece of the green ribbon long enough to wrap around the entire box plus ½ inch.
- Glue the ribbon to the outside of the box so it is centered on the craft paper and the ribbon ends overlap in the direct center of the front of the box.
- Using a ¼ inch round hole punch, punch a hole ¾ inch from the top of the box on the center of each side where the reinforcement was glued.
- Cut a piece of the lavender decorative ribbon the desired length of the handle plus 8 inches.
- Tie a knot on one end of the ribbon and feed the ribbon through one side of the box keeping the knot on the inside of the box.
- Allow the amount of ribbon desired for the length of the handle and feed the remaining length of the ribbon through the other hole.
- Tie a knot on the inside of the box on the other side. Trim the ends of each knot on the inside of the box.
- Glue the Easter egg ornament onto the center front of the box over the ribbon.
- Fill the bag with layered pink tissue paper to finish your Easter bag.
Note: After layering the tissue, cut the top angles of the tissue off with scissors to achieve the look in this picture.
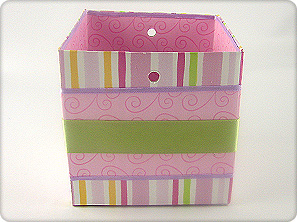
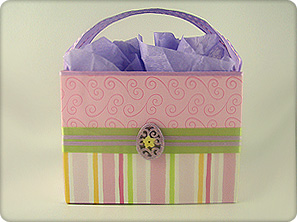
Large Square Box
Difficulty - Hard
Materials
- Large rectangular gift box
- Pastel striped scrapbooking or craft paper
- Pink scroll designed scrapbooking or craft paper
- 1 fancy lavender Easter egg ornament (string removed)
- 1 inch wide green satin ribbon
- 1/8 inch wide lavender ribbon
- 1-1/2 inch wide wired lavender decorative ribbon
- ¼ inch hole puncher
- Decorative lavender tissue paper
Instructions
- Cut the top and side flaps off of the gift box to make an open top box.
- Cut two 1-1/2 inch squares from the removed box top.
- Glue each square on the inside center top of the box, on opposite sides. This will help reinforce the handle. These will become the sides of the box.
To cover the outside of the box:
- Cut a piece of the striped craft paper 1/2 the length plus ½ inch and wide enough to wrap half way around the entire box (2 complete sides of the box) plus 1 inch.
- Cut another piece of the striped craft paper 1/2 the length plus ½ inch and wide enough to wrap half way around the entire box (2 complete sides of the box).
- Cut a piece of the striped craft paper the entire size of the bottom of the box.
- Measure a half of inch on the bottom edge of each pattern of craft paper and fold to create a box edge.
- On the piece that is an extra 1 inch wider, measure ½ inch on each side of the paper and fold to create a box edge.
- Wrap the paper around the box to make sure the folded edges fit nicely to the shape of the box, adjusting the folds if necessary.
- Make ½ inch cuts on each corner of the bottom ½ inch fold so the edges will form a box shape.
- Apply craft glue to the inside of the striped craft paper with the folded edges and attach it to the two full sides of the box, lining up the folded sides of the paper with the corners of the box. Fit the bottom folded edge to bottom of the box and the folded sides should overlap the outside corners of the box.
- Repeat the previous steps with the smaller piece of striped paper, meeting the side edges of the paper with the corners of the box. This paper should overlap the other piece.
- Apply glue to the striped craft paper that was cut to size the bottom of the box and attach.
- Cut a piece of the pink scrolled craft paper 1/2 the length plus ½ inch and wide enough to wrap half way around the entire box (2 complete sides of the box) plus 1 inch.
- Cut another piece of the pink scrolled craft paper 1/2 the length plus ½ inch and wide enough to wrap half way around the entire box (2 complete sides of the box).
- Measure a half of inch on the top edge of each piece of craft paper and fold to create a box edge.
- On the piece that is an extra 1 inch wider, measure ½ inch on each side of the paper and fold to create a box edge.
- Wrap the paper around the box to make sure the folded edges fit nicely to the shape of the box, adjusting the folds if necessary.
- Make ½ inch cuts on each corner of the top ½ inch fold so the edges will form a box shape.
- Apply craft glue to the inside of the craft paper with the folded edges and attach it to the two full sides of the box, lining up the pink craft paper with the edge of the striped craft paper and the folded sides of the paper with the corners of the box. Fit the top folded edge to top of the box and the folded sides should overlap the outside corners of the box.
- Repeat the previous steps with the smaller piece of paper, meeting the side edges of the paper with the corners of the box. This paper should overlap the other piece.
To line the inside of the box:
- Cut a piece of the pink scroll craft paper wide enough to wrap half way around the entire box (2 complete sides of the box) and the entire length plus ½ inch.
- Cut a second piece of the striped craft paper wide enough to wrap half way around the entire box (2 complete sides of the box) and the entire length.
- Cut a piece of the striped craft paper the entire size of the bottom of the box. Cut the tips off the corners of the square. (Try fitting it inside the box before gluing to make sure it is not too tight. The square may have to be trimmed a little to make sure it fits nicely.)
- Measure a 1/2 inch on the bottom edge of each piece of the striped craft paper and fold to create a box edge.
- Apply craft glue to the inside of the longer pink scroll craft paper and attach it to two sides of the inside of the box, lining up the edge of the paper with top edge the box. Fit the bottom folded edge to inside bottom of the box and the folded sides should overlap the inside corners of the box.
- Repeat the previous steps with the smaller piece of pink paper, meeting the side edges of the paper with the corners of the box. This paper should overlap the other piece.
- Apply glue to the striped craft paper that was cut to size the inside bottom of the box and attach.
- Cut a piece of the green ribbon long enough to wrap around the entire box plus ½ inch.
- Glue the ribbon to the outside of the box so it is centered on the craft paper and the ribbon ends overlap in the direct center of the front of the box.
- Cut 4 pieces of the thin lavender ribbon long enough to wrap around the entire width of the box plus 1/4 inch for overlap.
- Apply glue to the inside edge of the box and attach the 1 piece of ribbon, starting at a corner, overlapping the ribbon at the end. This ribbon should cover the craft paper edge on the inside of the box.
- Apply glue to the outside edge of the box and attach the 1 piece of ribbon, starting at a corner, overlapping the ribbon at the end. This ribbon should cover the craft paper edge on the outside of the box.
- Glue the other 2 pieces of lavender ribbon to the outside of the box centered on the green ribbon with ¼ inch space between the two ribbons.
- Using a ¼ inch round hole punch, punch a hole ¾ inch from the top of the box on the center of each side where the reinforcement was glued.
- Cut a piece of the lavender decorative ribbon the desired length of the handle plus 16 inches.
- Tie a knot on one end of the ribbon and feed the ribbon through one side of the box keeping the knot on the inside of the box.
- Tie a knot on the outside of the box on the other side of the hole. Try to make sure there is not much slack between the inside and outside knot.
- Allow the amount of ribbon desired for the length of the handle and tie a knot at the end.
- Feed the remaining length of the ribbon through the other hole and tie a knot on the inside of the box. Try to make sure there is not much slack between the inside and outside knot.
- Trim the ends of each knot on the inside of the box.
- Glue the Easter egg ornament onto the center front of the box over the ribbon.
- Fill the bag with layered lavender tissue paper to finish your Easter bag.
Note: After layering the tissue, cut the top angles of the tissue off with scissors to achieve the look in this picture.
|