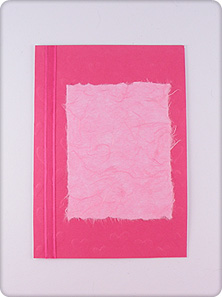
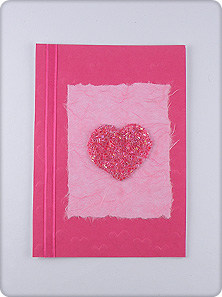
Small Box
Difficulty - Hard
Materials
- White plain gift card (plain gift cards can be found at your local craft store)
- Dark pink heart embossed scrapbooking or craft paper
- Light pink scrapbooking paper with paper fibers
- 1/2-inch wide dark pink sheer ribbon
- 1 bag of small dark pink seed beads
- Scotch® Precision Scissors (7” for cutting paper and ribbon)
- Scotch® Permanent Glue Stick (for attaching scrapbooking paper)
- Scotch® Clear Glue with 2-Way Applicator (for gluing ribbon)
- Scotch® Quick Drying Tacky Glue (for gluing the beaded heart)
Instructions
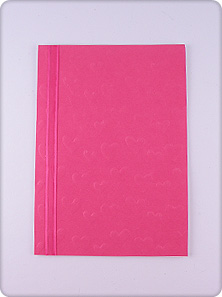
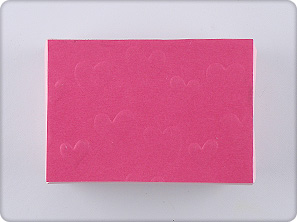
- Using Scotch® Precision Scissors cut a piece of the pink heart embossed scrapbooking paper the entire length and width of the front of the card.
- Using the Scotch® Permanent Glue Stick, apply glue to the wrong side of the pink heart paper, especially around the edges. Attach it to the front of the gift card, lining up the edges of the paper with the edges of the card.
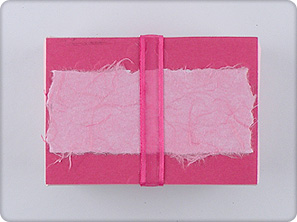
- Using Scotch® Precision Scissors cut a piece of the dark pink sheer ribbon the entire length of the front of the card.
- Using the precision tip of Scotch® Clear Glue, attach the ribbon to the front of the card about 1/2 inch from the left edge of the card. Small amounts of glue can be added to the cut edges of each side of the ribbon to prevent fraying.
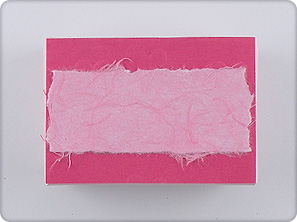
- Measure a piece of the light pink craft paper 3 inches smaller than the length and 1-1/2 inches smaller than the width of the card. Tear the edges of the craft paper by holding a straight edge along the measured line to control the tear.
- Using the Scotch® Permanent Glue Stick, apply glue to the wrong side of the light pink craft paper, especially around the edges. Attach it to the front of the card, centering the paper between the ribbon and the right edge of the card.
- To make heart, lightly draw a heart shape on the center on the pink craft paper. Outline and fill in the heart with Scotch® Quick Drying Tacky Glue. Sprinkle beads onto the glue heart shape so all of the spaces are filled in. Shake off the excess beads onto a piece of paper so they can be saved. Some adjusting may need to be done to the shape of the heart by adding dots of glue and adding more beads.
Note: The imperfections in the heart’s shape add to the gift's charm.
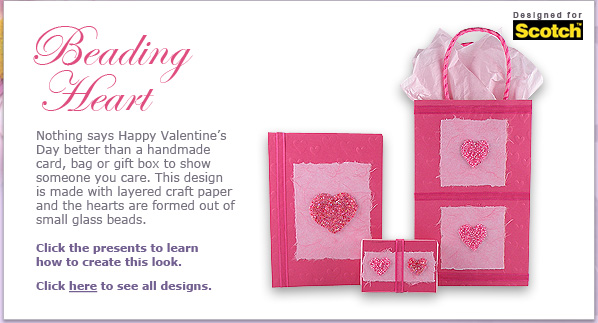
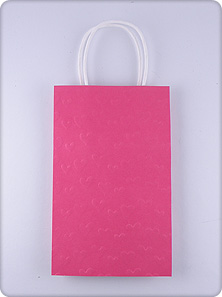
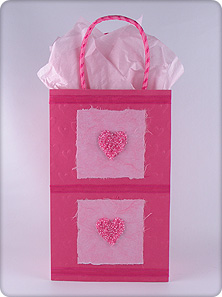
Gift Card Holder
Difficulty - Hard
Materials
- Light pink gift bag with stiff handles (plain gift bags are inexpensive and easy to find at your local craft or party store)
- Dark pink heart embossed scrapbooking or craft paper
- Light pink scrapbooking paper with paper fibers
- 1/2-inch wide dark pink sheer ribbon
- 1 bag of small light pink seed beads
- Light pink decorative tissue paper
- Scotch® Precision Scissors (7” for cutting paper and ribbon)
- Scotch® Permanent Glue Stick (for attaching scrapbooking paper)
- Scotch® Clear Glue with 2-Way Applicator (for gluing ribbon)
- Scotch® Quick Drying Tacky Glue (for gluing the beaded heart)
Instructions
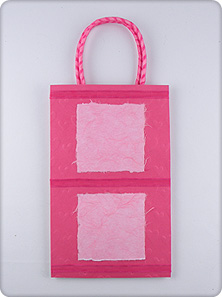
- Using Scotch® Precision Scissors cut a piece of the pink heart embossed scrapbooking paper the entire length and width of the front of the bag.
- Using the Scotch® Permanent Glue Stick, apply glue to the wrong side of the pink heart paper, especially around the edges. Attach it to the front of the bag, lining up the edges of the paper with the edges of the bag.
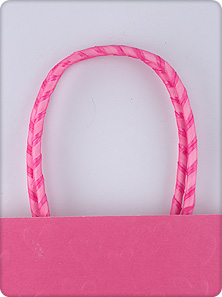
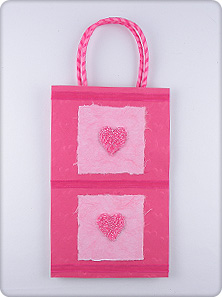
- To cover the handles, apply a small amount of Scotch® Quick Drying Tacky Glue to a few inches of the back of the pink sheer ribbon and wrap the ribbon around the handle where it meets with the inside of the bag.
- Continue to add small amounts of glue to the ribbon, a few inches at a time, as you continue to wrap the ribbon around the handle, slightly overlapping the ribbon.
- Finish by cutting the ribbon and gluing the end behind the handle where it meets with the inside of the bag. Repeat this process with the other handle.
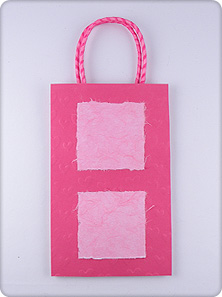
- Measure two 3 x 3 inch pieces of the light pink craft paper. Tear the edges of the craft paper by holding a straight edge along the measured line to control the tear.
- Using the Scotch® Permanent Glue Stick, apply glue to the wrong side of the pink craft paper, especially around the edges. Attach it to the front of the bag, centering the two pieces of paper evenly between top and sides of the bag.
- Cut three pieces of the pink sheer ribbon the entire width of the front of the gift bag.
- Using the precision tip of Scotch® Clear Glue, attach each piece of the pink ribbon to the front of the gift bag so one piece is centered between the two pieces of torn craft paper and the other two are centered between the torn craft paper and the top and bottom edge of the bag. Small amounts of glue can be added to the cut edges of each side of the ribbon to prevent fraying.
- To make hearts, lightly draw a heart shape on the center of each piece of the pink craft paper. Outline and fill in the heart with Scotch® Quick Drying Tacky Glue. Sprinkle beads onto the glue heart shapes so all of the spaces are filled in. Shake off the excess beads onto a piece of paper so they can be saved. Some adjusting may need to be done to the shape of the hearts by adding dots of glue and adding more beads.
Note: The imperfections in the heart’s shape add to the gift's charm.
- Fill the bag with layered tissue paper.
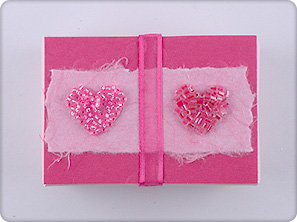
Large Box
Difficulty - Hard
Materials
- Small white or pink box with a lid
- Dark pink heart embossed scrapbooking or craft paper
- Light pink scrapbooking paper with paper fibers
- 1/2-inch wide dark pink sheer ribbon
- 1 bag of small light pink seed beads
- 1 bag of small dark pink seed beads
- Scotch® Precision Scissors (7” for cutting paper and ribbon)
- Scotch® Permanent Glue Stick (for attaching scrapbooking paper)
- Scotch® Clear Glue with 2-Way Applicator (for gluing ribbon)
- Scotch® Quick Drying Tacky Glue (for gluing the beaded heart)
Instructions
- Using Scotch® Precision Scissors cut a piece of the pink heart embossed scrapbooking paper the entire length and width of the top of the box lid.
- Using the Scotch® Permanent Glue Stick, apply glue to the wrong side of the pink heart paper, especially around the edges. Attach it to the top of the box lid, lining up the edges of the paper with the edges of the box.
- Measure a piece of the light pink craft paper 1 inch wide and 1/4 inch smaller than the width of the box lid. Tear the edges of the craft paper by holding a straight edge along the measured line to control the tear.
- Using the Scotch® Permanent Glue Stick, apply glue to the wrong side of the light pink craft paper, especially around the edges. Attach it to the top of the box lid, centering the paper evenly between top and sides of the lid.
- Cut a piece of the pink sheer ribbon the entire length of the top of the box.
- Using the precision tip of Scotch® Clear Glue, attach the piece of the pink ribbon to the top of the box lid so it is centered on the torn craft paper and between the side edges of the box. Small amounts of glue can be added to the cut edges of each side of the ribbon to prevent fraying.
- To make hearts, lightly draw a heart shape on the each side of the pink craft paper centered between the ribbon and the edge of the box. Outline and fill in the heart with Scotch® Quick Drying Tacky Glue. Sprinkle the light pink beads onto one of the glue heart shapes so all of the spaces are filled in. Shake off the excess beads onto a piece of paper so they can be saved. Some adjusting may need to be done to the shape of the heart by adding dots of glue and adding more beads. Repeat on the other side with the dark pink beads.
Note: The imperfections in the heart’s shape add to the gift's charm.
|