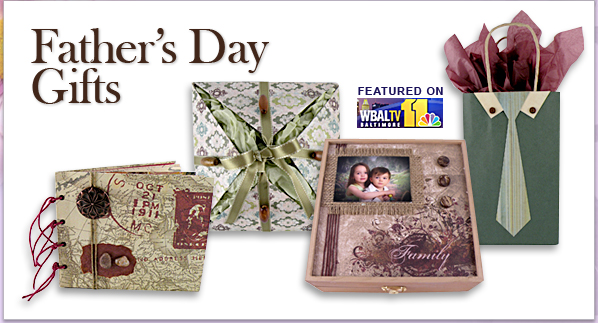
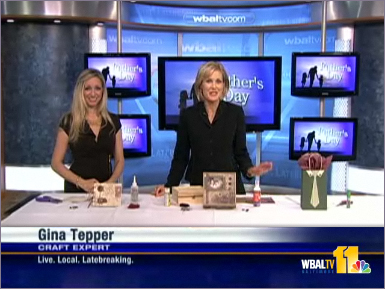
See Gina demonstrate her designs on WBAL NBC News in Baltimore
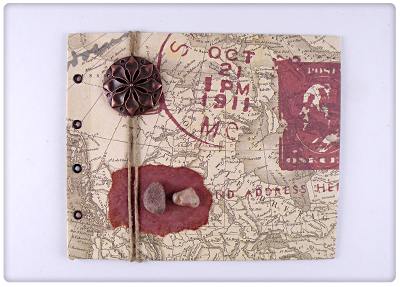
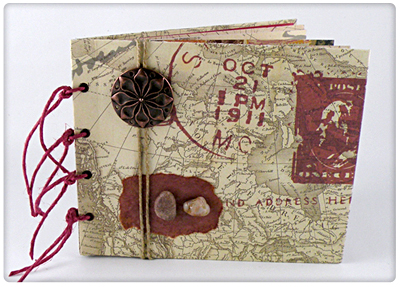
Memory Book
Difficulty - Easy
Materials
- Cardstock – cut from reused shirt box (for the front and back cover)
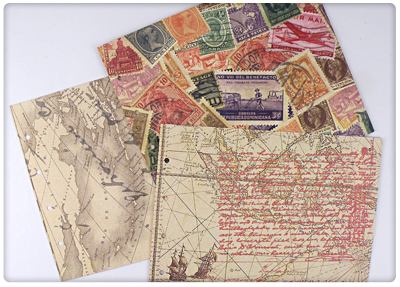
- Coordinated styles of double-sided scrapbooking paper – cardstock weight (for the cover and the pages)
- Coordinating twine or raffia (for binding the book)
- Metal eyelets
- Photo corners
- Craft scissors
- Hole punch
- Glues stick
- Craft Glue
Instructions
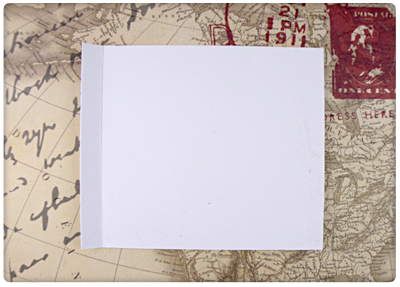
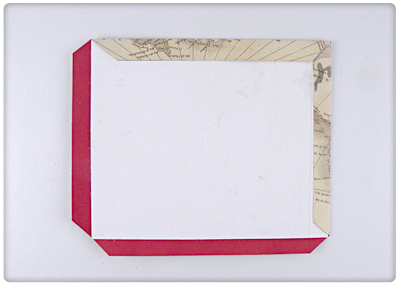
- Cut two pieces of cardstock from and old shirt box 5 inches by 6 inches wide. Fold one side of the short end on the cardstock over ½ inch to create some flexibility at the binding.
- Cut a piece of scrapbooking paper slightly larger than the cardstock. Apply glue stick to one side of the cardstock and attach, centering on the scrapbooking paper.
- Trim the corners off at an angle, making sure not to cut the cardstock.
- Add glue to the scrapbooking paper edges and fold down. Repeat on these steps on back cover.
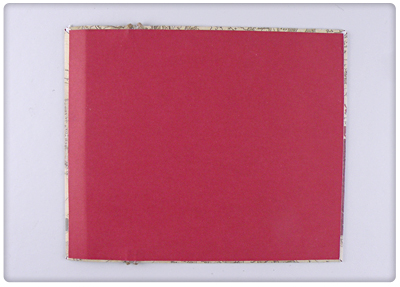
- Cut a piece of the reversible side of the scrapbooking paper slightly smaller than the cardstock. Apply glue stick to wrong side of the scrapbooking paper and attach, centering it on the inside of the cover to give it a finished look. Repeat on the back cover.
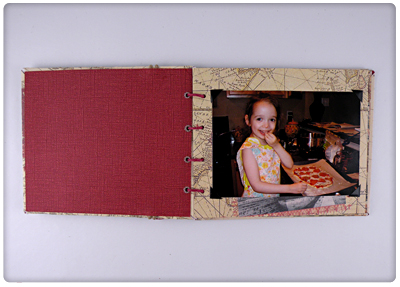
- Cut pieces of coordinating scrapbooking paper slightly smaller than the covers of the book for the inside pages.
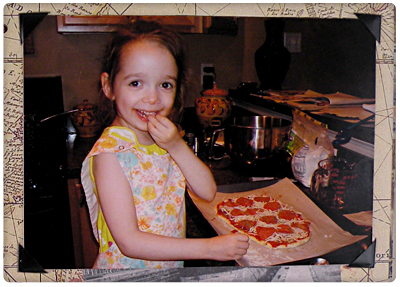
- Use photo corners to attach the photos to the pages. They may also be glued to attach them permanently.
- Glue accents to the front cover of the book with craft glue. Let dry.
- Punch holes in the cover on the binding and attach eyelets to stabilize.
- Line up the inside pages with the holes on the front and back cover and mark the location. Punch holes with a hole punch.
- Feed twine through the holes and tie to create the binding. Trim to matching lengths to finish your memory book.
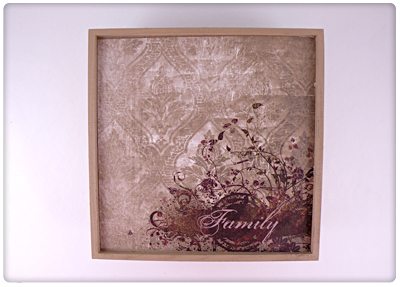
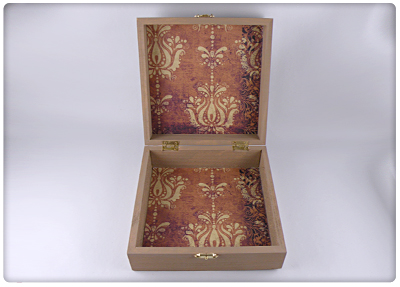
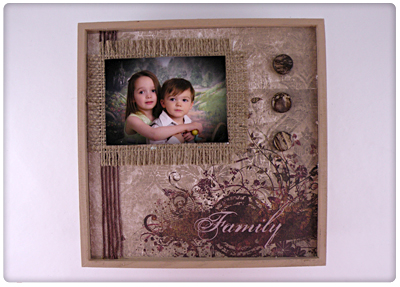
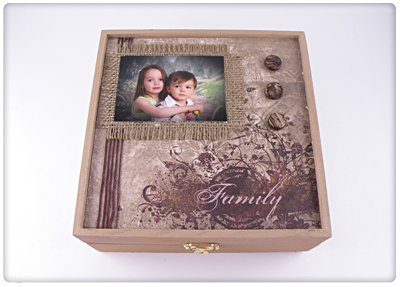
Fathers Day Keepsake Box
Difficulty - Easy
A keepsake box is a great gift for holding items of interest picked up along the way. Fill the box with sentimental things picked up along the way. The box can even be used to hold a gift for an extra surprise when it is opened.
Materials
- Unfinished wooden box with latch
- Acrylic craft paint
- Two sheets of coordinating double-sided scrapbooking paper – cardstock weight (two different styles)
- One sheet matching felt (to cover the bottom of the box)
- Photo
- Small piece of burlap
- Coordinating color natural twine
- Glass seed beads (for the center of the ribbon flowers)
- Wooden beads
- Craft scissors
- Craft Glue
Instructions
- Paint the entire wooden box with a foam brush and acrylic craft glue. Only paint one coat to let some of the wood grain show through. Let dry.
- Cut a piece of scrapbooking paper the size of the top of the box. Apply glue to wrong side of the scrapbooking paper and attach to the top of the box. Make sure to smooth it out all the bubbles.
- Cut two pieces of scrapbooking paper the size of the inside of the top of the box and bottom of the box. Apply glue to wrong side of the scrapbooking paper and attach to the inside of the box. Make sure to smooth it out all the bubbles.
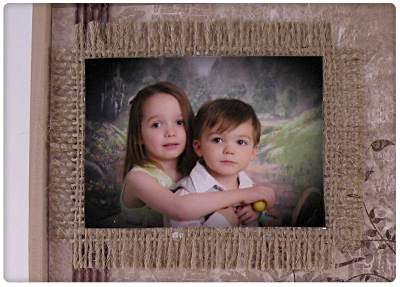
- Cut a piece of the burlap slightly larger than the photo and fray the edges to create a matte. Apply glue to wrong side of the photo and attach, centering it on the burlap.
- Cut a piece of felt slightly smaller than the bottom of the box. Apply craft glue to the bottom of the box and attach the felt. Let dry.
- Attach the strands of twine, photo and wooden buttons to the top of the keepsake box to complete your custom gift.
Pyramid Gift Card Holder
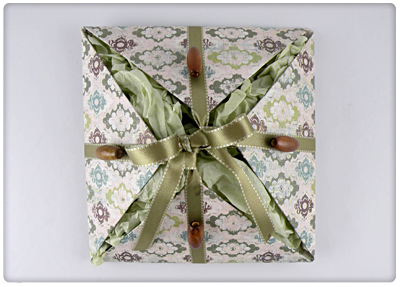
Difficulty - Easy
Gift cards and money make great gifts when you are not sure what someone has or wants — here is a great way to give them a personal touch. It can also be used to hold a small gift. Once it is untied, it can be saved and reused.
Materials
- 12 x12 scrapbooking paper – cardstock weight
- ¼ inch wide satin ribbon
- Four wooden buttons
- Tissue paper to match the cardstock color
- Glue stick
- Craft glue
Instructions
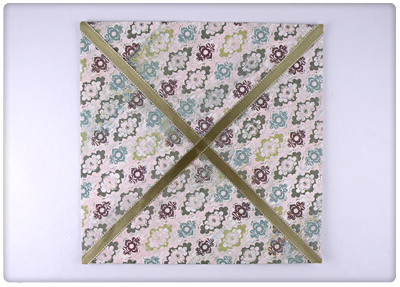
- On the wrong side of the paper, draw lines from each corner to the opposite corner to mark the center point of the paper.
- On the wrong side of the paper, fold each corner into the center of the square.
- Using the glue stick, apply glue to the wrong side of each folder corner flap and fold down to secure.
- Cut two pieces of ribbon measuring the diagonal length from corner to corner.
- Using the craft glue, attach the ribbon to the paper square on the diagonal, centering the ribbon evenly on the top folded seam and trimming the corners to match the corners of the paper.
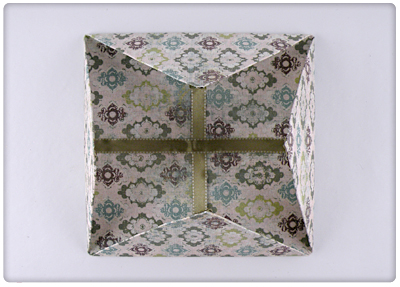
- Fold each corner of the paper down into the center point of the square again.
- Cut two 11 inch strips of ribbon and two 4 inch pieces of ribbon.
- Apply craft glue to center of the triangle flaps and attach the strips of ribbon to all sides. Create loops with the smaller pieces so the longer pieces can be feed through and tied. Let dry.
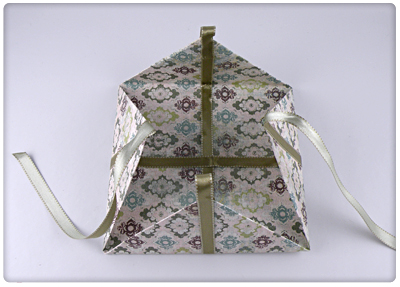
- Place the gift or gift card inside the box. Crumple a piece of tissue paper and fit it into the inside of the gift card holder. Feed the ribbon tails though the ribbon loops and tie a bow.
- Glue the wooden buttons on to the ribbon on each side of the gift cards holder to finish the look.
Fathers Day Gift Bag
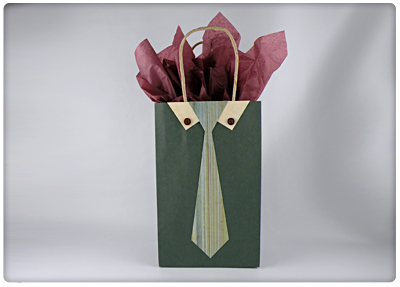
Difficulty - Easy
Rather than buy a gift bag this year, create a custom one from a plain gift bag decorated with scrapbooking paper and buttons to make a Father’s Day Tie theme. Custom made gift bags are less expensive than a purchasing one and the personal touch adds to the bag’s charm.
Plain gift bags can be found at your local craft store along with scrapbooking paper and buttons. Trace a tie and shirt shape, cut it out and attach it to the front of the bag with craft glue. Attach buttons to the shirt collar, fill with tissue to finish the bag.
|