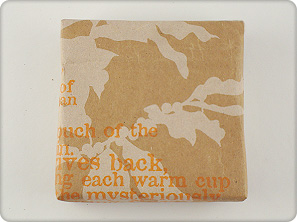
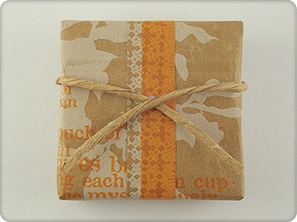
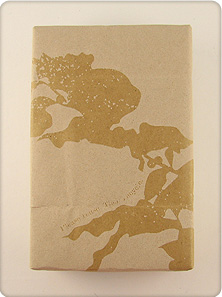
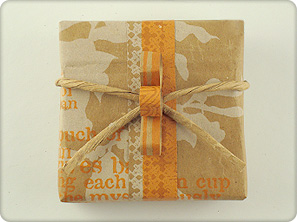
Small Box
Difficulty - Medium
This gift incorporates all elements of the brown paper shopping bag into the design, including the handle.
Materials
- Brown paper bag with a pattern on the front and colored sides and stiff handles
- Scotch® Precision Scissors (7” for cutting paper)
- Scotch® Double Sided Tape or Scotch® Pop-Up Tape (for wrapping the gift)
- Scotch® Permanent Glue Stick (for attaching layered color bands of paper)
- Scotch® Clear Glue with 2-Way Applicator (for gluing paper ribbons)
- Scotch® Quick Drying Tacky Glue (for attaching twine bow)
Instructions
- Cut open the brown paper bag on one side and cut off the bottom using Scotch® Precision Scissors.
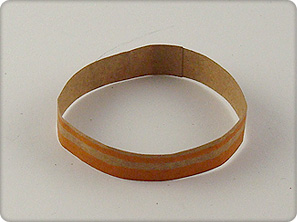
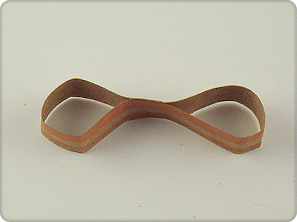
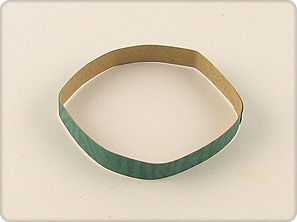
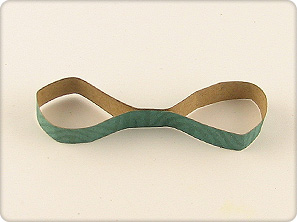
- Carefully remove the handles from the shopping bag, avoiding tears in the bag and keeping the handles intact.
- Wrap a box in the brown paper using either Scotch® Double Sided Tape or Scotch® Pop-Up Tape. Try to account for any pattern in the paper so it will be visible on the front of the box.
Note: The creases and imperfections in the paper add to the gift's recycled charm.
- Cut a piece of the colored part of the bag measuring 1 inch wide and the length to wrap around the entire box plus 1 inch. If the paper is not long enough to wrap around the entire box, glue two pieces together on the wrong side of the paper with the precision tip of Scotch® Clear Glue to achieve the desired length.
- Using the Scotch® Permanent Glue Stick, apply glue to the wrong side of the 1 inch paper strip, especially around the edges. Attach the strip to the box, centering the paper evenly on the top of the box and overlapping the ends on the bottom of the box.
- Wrap the removed handle around the box, crossing the ends on the front center. Apply a small amount of Scotch® Quick Drying Tacky Glue on the center back of the box under the twine and on the center top to secure the overlapping ends. Hold until dry.
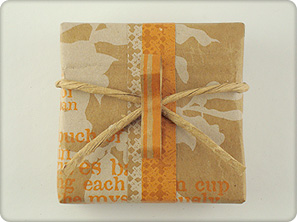
- To make the bow, cut a piece of the colored part of the bag 3/8 inches wide and 5-1/2 inches long. Try to find a piece of the bag that has different colored patterns to add interest to the design. Fold the ends to middle, overlapping about 1/4 inch, and glue with the precision tip of Scotch® Clear Glue to form a loop.
- Apply glue to the inside center to create two loops.
- To make the second layer of the bow, cut a 3/8-inch wide and 2-inch long piece of patterned part of the bag. Fold the ends to middle and glue, overlapping about 1/4 inch to form a loop. Leave it open like a tube.
- Using the precision tip of Scotch® Clear Glue, attach the larger ribbon loop onto the center of the crossed twine.
- Glue the smaller loop directly onto the larger loop to form a layered bow.
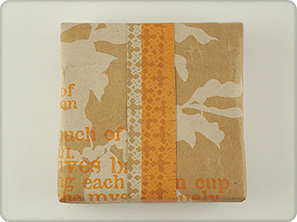
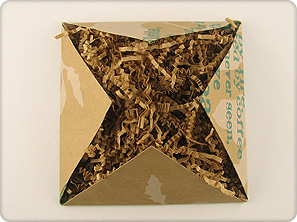
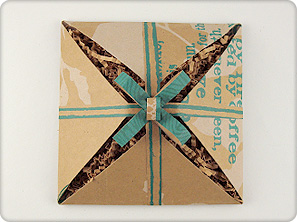
Gift Card Holder
Difficulty - Medium
This is design is made out of folded paper cut from a brown paper shopping bag. This gift will definitely receive a positive response because of its creative and unique appearance.
Materials
- Brown paper bag with a pattern on the front and colored sides
- Scotch® Precision Scissors (7” for cutting paper)
- Scotch® Permanent Glue Stick (for attaching layered color bands of paper)
- Scotch® Clear Glue with 2-Way Applicator (for gluing paper ribbons)
- Brown shredded paper
Instructions
- Cut open the brown paper bag on one side and cut off the bottom using Scotch® Precision Scissors.
- Carefully remove the handles from the shopping bag, avoiding tears in the bag.
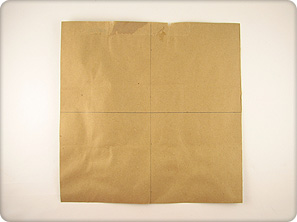
- Cut a piece of the bag measuring a 12 inch x 12 inch square.
- On the wrong side of the paper, mark the center point on all sides and draw a line to the opposite side’s center point on both the top and sides of the paper.
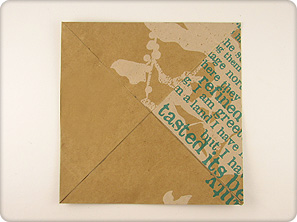
- On the wrong side of the paper, fold each corner into the center of the square.
- Using the Scotch® Permanent Glue Stick, apply glue to the wrong side of each folder corner flap and fold over to secure.
- Cut two 3/8-inch wide pieces of the colored part of the bag the length measuring the diagonal from corner to corner.
- Using the Scotch® Permanent Glue Stick, apply glue to the wrong side of each of the paper strips, especially around the edges. Attach the strips to the paper square on the diagonal, centering the paper evenly on the top folded seam and trimming the corners to match the square.
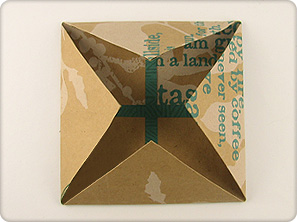
- Fold each corner of the paper into the center point of the square.
- Insert the gift card into the the folded square and fill with shredded brown paper.
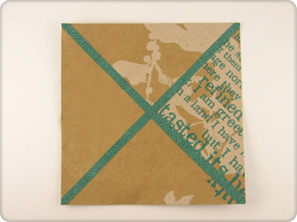
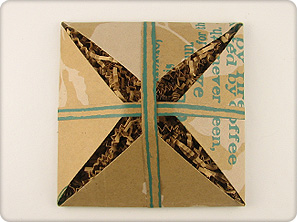
- Cut two 3/8-inch wide pieces of the colored part of the bag the length measuring from one front side of the square to the other side.
- Using the Scotch® Permanent Glue Stick, apply glue to the wrong side of each of the paper strips, especially around the edges. Attach the strips to the paper square centered both vertically and horizontally over each folded point.
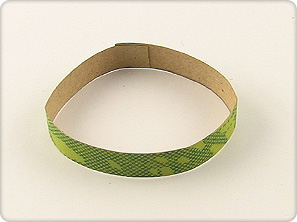
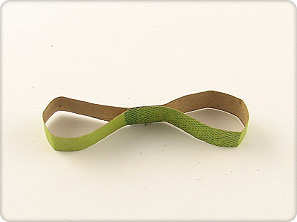
- To make the bow, cut two pieces of the colored part of the bag 3/8-inches wide and 7-inches long. Try to find a piece of the bag that has different colored patterns to add interest to the design. Fold the ends to middle, overlapping about 1/4 inch, and glue with the precision tip of Scotch® Clear Glue to form a loop.
- Apply glue to the inside center to create two loops.
- To make the second layer of the bow, cut a 3/8-inch wide and 2-inch long piece of patterned part of the bag. Fold the ends to middle and glue, overlapping about 1/4 inch to form a loop. Leave it open like a tube.
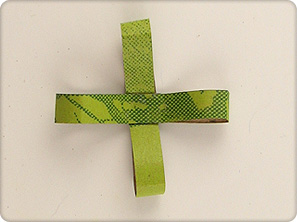
- Using the precision tip of Scotch® Clear Glue, attach the two longer paper loops, one at a time, onto the center of the square at an angle to form an X shape.
- Glue the small open loop directly on to the center of the larger loops to form a bow.
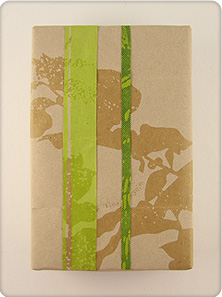
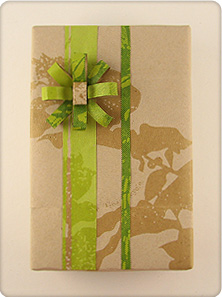
Large Box
Difficulty - Medium
Materials
- Brown paper bag with a pattern on the front and colored sides.
- Scotch® Precision Scissors (7” for cutting paper)
- Scotch® Permanent Glue Stick (for attaching layered color bands of paper)
- Scotch® Clear Glue with 2-Way Applicator (for gluing paper ribbons)
Instructions
- Cut open the brown paper bag on one side and cut off the bottom using Scotch® Precision Scissors.
- Carefully remove the handles from the shopping bag, avoiding tears in the bag.
- Wrap a box in the brown paper using either Scotch® Double Sided Tape or Scotch® Pop-Up Tape. Try to account for any pattern in the paper so it will be visible on the front of the box.
Note: The creases and imperfections in the paper add to the gift's recycled charm.
- Cut a piece of the colored part of the bag measuring 1-inch wide and the full length of the top of the box.
- Using the Scotch® Permanent Glue Stick, apply glue to the wrong side of the 1-inch wide paper strip, especially around the edges. Attach the strip to the box, about one inch from the left side of the box, lining up the edges of the paper with the top edge and bottom edge of the box.
- Cut one 3/8-inch wide piece of the colored part of the bag the full length of the top of the box.
- Using the Scotch® Permanent Glue Stick, apply glue to the wrong side of the 3/8-inch wide paper strip, especially around the edges. Attach the strip to the box, about 3/4-inch from the left edge of the 1-inch wide strip, lining up the edges of the paper with the top edge and bottom edge of the box.
- To make the bow, cut four pieces of the colored part of the bag 3/8 inches wide and 5-1/2 inches long. Try to find a piece of the bag that has different colored patterns to add interest to the design. Fold the ends to middle, overlapping about 1/4 inch, and glue with the precision tip of Scotch® Clear Glue to form a loop.
- Apply glue to the inside center to create two loops.
- To make the second layer of the bow, cut a 3/8-inch wide and 2-inch long piece of the brown patterned part of the bag. Fold the ends to middle and glue, overlapping about 1/4 inch to form a loop. Leave it open like a tube.
- Using the precision tip of Scotch® Clear Glue, attach two paper loops, one inch from the top of the box, onto the center of the 1 inch wide paper strip at an angle to form an X shape.
- Glue the other two paper ribbon loops, one at a time, onto the center of other two ribbon loops to form a plus shape.
- Glue the small open loop directly on to the center of the larger loops to form the flower.
|